安装
go get github.com/uber/go-torch # 再安装 brendangregg/FlameGraph export PATH=$PATH:/absolute/path/FlameGraph-master # 还需要安装一个graphviz用来画内存图 yum install graphviz 代码修改
import "net/http" import _ "net/http/pprof" func main() { // 主函数中添加 go func() { http.HandleFunc("/program/html", htmlHandler) // 用来查看自定义的内容 log.Println(http.ListenAndServe("0.0.0.0:8080", nil)) }() } 使用
# 用 -u 分析CPU使用情况 ./go-torch -u http://127.0.0.1:8080 # 用 -alloc_space 来分析内存的临时分配情况 ./go-torch -alloc_space http://127.0.0.1:8080/debug/pprof/heap --colors=mem # 用 -inuse_space 来分析程序常驻内存的占用情况; ./go-torch -inuse_space http://127.0.0.1:8080/debug/pprof/heap --colors=mem # 画出内存分配图 go tool pprof -alloc_space -cum -svg http://127.0.0.1:8080/debug/pprof/heap > heap.svg 查看
http://127.0.0.1:10086/debug/pprof/handlefunc writeBuf(buffer *bytes.Buffer, format string, a ...interface{}) { (*buffer).WriteString(fmt.Sprintf(format, a...)) } func htmlHandler(w http.ResponseWriter, req *http.Request) { io.WriteString(w, statusHtml()) } // 访问 localhost:8080/program/html 可以看到一个表格,一秒钟刷新一次 func statusHtml() string { var buf bytes.Buffer buf.WriteString("<html><meta http-equiv=\"refresh\" content=\"1\">" + "<body><h2>netflow-decoder status count</h2>" + "<table width=\"500px\" border=\"1\" cellpadding=\"5\" cellspacing=\"1\">" + "<tr><th>NAME</th><th>TOTAL</th><th>SPEED</th></tr>") writeBuf(&buf, "<tr><td>UDP</td><td>%d</td><td>%d</td></tr>", total, speed) ... buf.WriteString("</table></body></html>") return buf.String() } 火焰图的效果网上很多,下一篇介绍基本的调优过程
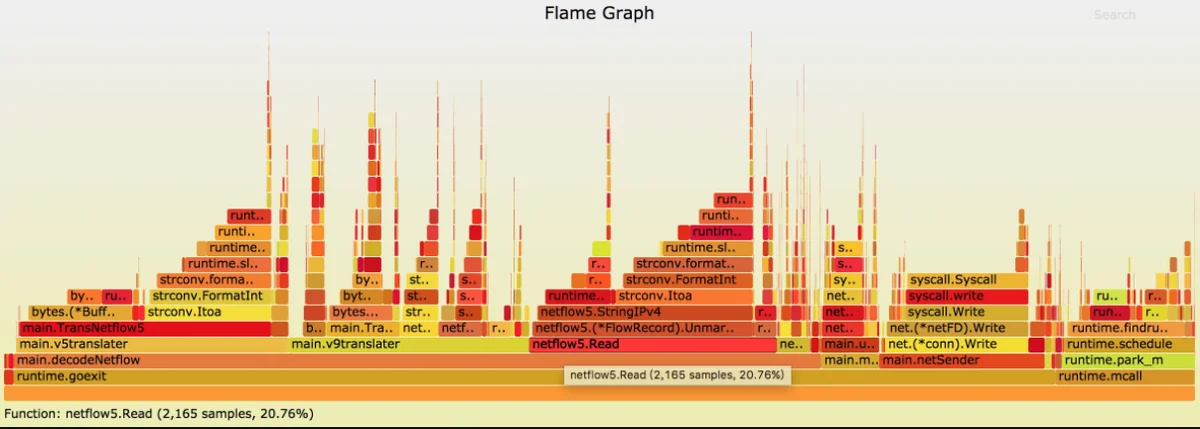
火焰图效果

火焰图自下而上是函数的调用关系,底下的一个方块是入口,对应其上面的方块是他直接或者间接调用到的,长度是运行时所占用的CPU时长,颜色没有特别的意义
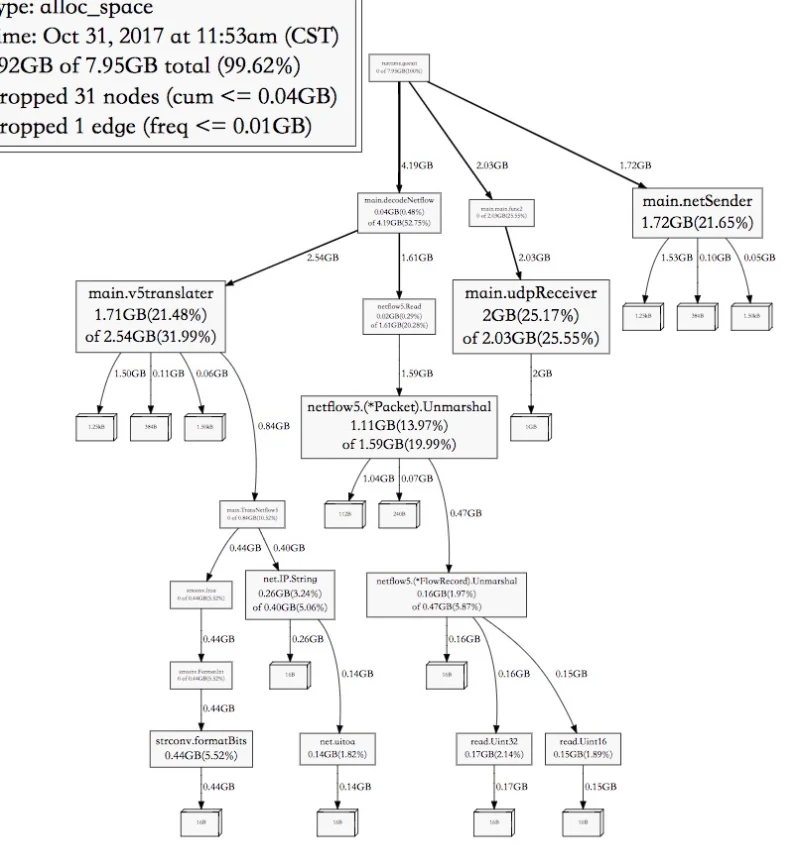
pprof内存分配图效果

从上到下是调用关系,如箭头所示,表示给每个函数【累计】分配了多少内存,包括它自己占用多少以及向下调用时分配了多少。从这个就可以看出程序中哪个地方最消耗内存,最底下没有名字的方块是这个函数内,每次向系统申请内存的大小
实际图片是svg格式的,可以无限方法,这里只是看个大概(人为打码)。
