

io.Writer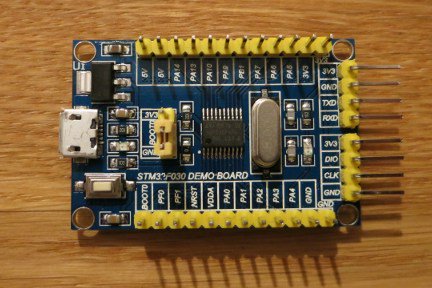
STM32F030F4P6
并发 Blinky – 回顾
SetClearOnOffLED
type LED struct {pin gpio.Pin}func (led LED) On() {led.pin.Clear()}func (led LED) Off() {led.pin.Set()}
led.On()led.Off()在前面的所有示例中,我都尝试使用相同的 漏极开路配置来避免代码复杂化。但是在最后一个示例中,对于我来说,将第三个 LED 连接到 GND 和 PA3 引脚之间并将 PA3 配置为推挽模式会更容易。下一个示例将使用以此方式连接的 LED。
LEDOpenDrainLEDPushPullLED
type PushPullLED struct {pin gpio.Pin}func (led PushPullLED) On() {led.pin.Set()}func (led PushPullLED) Off() {led.pin.Clear()}
请注意,这两种类型都具有相同的方法,它们的工作方式也相同。如果在 LED 上运行的代码可以同时使用这两种类型,而不必注意当前使用的是哪种类型,那就太好了。 接口类型可以提供帮助:
package mainimport ("delay""stm32/hal/gpio""stm32/hal/system""stm32/hal/system/timer/systick")type LED interface {On()Off()}type PushPullLED struct{ pin gpio.Pin }func (led PushPullLED) On() {led.pin.Set()}func (led PushPullLED) Off() {led.pin.Clear()}func MakePushPullLED(pin gpio.Pin) PushPullLED {pin.Setup(&gpio.Config{Mode: gpio.Out, Driver: gpio.PushPull})return PushPullLED{pin}}type OpenDrainLED struct{ pin gpio.Pin }func (led OpenDrainLED) On() {led.pin.Clear()}func (led OpenDrainLED) Off() {led.pin.Set()}func MakeOpenDrainLED(pin gpio.Pin) OpenDrainLED {pin.Setup(&gpio.Config{Mode: gpio.Out, Driver: gpio.OpenDrain})return OpenDrainLED{pin}}var led1, led2 LEDfunc init() {system.SetupPLL(8, 1, 48/8)systick.Setup(2e6)gpio.A.EnableClock(false)led1 = MakeOpenDrainLED(gpio.A.Pin(4))led2 = MakePushPullLED(gpio.A.Pin(3))}func blinky(led LED, period int) {for {led.On()delay.Millisec(100)led.Off()delay.Millisec(period - 100)}}func main() {go blinky(led1, 500)blinky(led2, 1000)}
LEDOnOffPushPullLEDOpenDrainLEDMake*LEDLEDLED
led1 = MakeOpenDrainLED(gpio.A.Pin(4))led2 = MakePushPullLED(gpio.A.Pin(3))
led1OpenDrainLED{gpio.A.Pin(4)}OpenDrainLEDled1.On()
led1.methods->On(led1.value)
如你所见,如果仅考虑函数调用的开销,这是相当廉价的抽象。
但是,对接口的任何赋值都会导致包含有关已赋值类型的大量信息。对于由许多其他类型组成的复杂类型,可能会有很多信息:
$ egc$ arm-none-eabi-size cortexm0.elftext data bss dec hex filename10356 196 212 10764 2a0c cortexm0.elf
如果我们不使用 反射,可以通过避免包含类型和结构字段的名称来节省一些字节:
$ egc -nf -nt$ arm-none-eabi-size cortexm0.elftext data bss dec hex filename10312 196 212 10720 29e0 cortexm0.elf
生成的二进制文件仍然包含一些有关类型的必要信息和关于所有导出方法(带有名称)的完整信息。在运行时,主要是当你将存储在接口变量中的一个值赋值给任何其他变量时,需要此信息来检查可赋值性。
我们还可以通过重新编译所导入的包来删除它们的类型和字段名称:
$ cd $HOME/emgo$ ./clean.sh$ cd $HOME/firstemgo$ egc -nf -nt$ arm-none-eabi-size cortexm0.elftext data bss dec hex filename10272 196 212 10680 29b8 cortexm0.elf
让我们加载这个程序,看看它是否按预期工作。这一次我们将使用 st-flash 命令:
$ arm-none-eabi-objcopy -O binary cortexm0.elf cortexm0.bin$ st-flash write cortexm0.bin 0x8000000st-flash 1.4.0-33-gd76e3c72018-04-10T22:04:34 INFO usb.c: -- exit_dfu_mode2018-04-10T22:04:34 INFO common.c: Loading device parameters....2018-04-10T22:04:34 INFO common.c: Device connected is: F0 small device, id 0x100064442018-04-10T22:04:34 INFO common.c: SRAM size: 0x1000 bytes (4 KiB), Flash: 0x4000 bytes (16 KiB) in pages of 1024 bytes2018-04-10T22:04:34 INFO common.c: Attempting to write 10468 (0x28e4) bytes to stm32 address: 134217728 (0x8000000)Flash page at addr: 0x08002800 erased2018-04-10T22:04:34 INFO common.c: Finished erasing 11 pages of 1024 (0x400) bytes2018-04-10T22:04:34 INFO common.c: Starting Flash write for VL/F0/F3/F1_XL core id2018-04-10T22:04:34 INFO flash_loader.c: Successfully loaded flash loader in sram11/11 pages written2018-04-10T22:04:35 INFO common.c: Starting verification of write complete2018-04-10T22:04:35 INFO common.c: Flash written and verified! jolly good!
-reset
Interfaces
st-flashUART
UART(通用异步收发传输器)仍然是当今微控制器最重要的外设之一。它的优点是以下属性的独特组合:
- 相对较高的速度,
- 仅两条信号线(在 半双工 通信的情况下甚至一条),
- 角色对称,
- 关于新数据的 同步带内信令(起始位),
- 在传输 字 内的精确计时。
这使得最初用于传输由 7-9 位的字组成的异步消息的 UART,也被用于有效地实现各种其他物理协议,例如被 WS28xx LEDs 或 1-wire 设备使用的协议。
但是,我们将以其通常的角色使用 UART:从程序中打印文本消息。
package mainimport ("io""rtos""stm32/hal/dma""stm32/hal/gpio""stm32/hal/irq""stm32/hal/system""stm32/hal/system/timer/systick""stm32/hal/usart")var tts *usart.Driverfunc init() {system.SetupPLL(8, 1, 48/8)systick.Setup(2e6)gpio.A.EnableClock(true)tx := gpio.A.Pin(9)tx.Setup(&gpio.Config{Mode: gpio.Alt})tx.SetAltFunc(gpio.USART1_AF1)d := dma.DMA1d.EnableClock(true)tts = usart.NewDriver(usart.USART1, d.Channel(2, 0), nil, nil)tts.Periph().EnableClock(true)tts.Periph().SetBaudRate(115200)tts.Periph().Enable()tts.EnableTx()rtos.IRQ(irq.USART1).Enable()rtos.IRQ(irq.DMA1_Channel2_3).Enable()}func main() {io.WriteString(tts, "Hello, World!\r\n")}func ttsISR() {tts.ISR()}func ttsDMAISR() {tts.TxDMAISR()}//c:__attribute__((section(".ISRs")))var ISRs = [...]func(){irq.USART1: ttsISR,irq.DMA1_Channel2_3: ttsDMAISR,}
usart.DriverSTM32 USART 外设提供传统的 UART 及其同步版本。要将其用作输出,我们必须将其 Tx 信号连接到正确的 GPIO 引脚:
tx.Setup(&gpio.Config{Mode: gpio.Alt})tx.SetAltFunc(gpio.USART1_AF1)
usart.Driver
tts = usart.NewDriver(usart.USART1, d.Channel(2, 0), nil, nil)
WriteString
$ cd $HOME/emgo$ ./clean.sh$ cd $HOME/firstemgo$ egc$ arm-none-eabi-size cortexm0.elftext data bss dec hex filename12728 236 176 13140 3354 cortexm0.elf
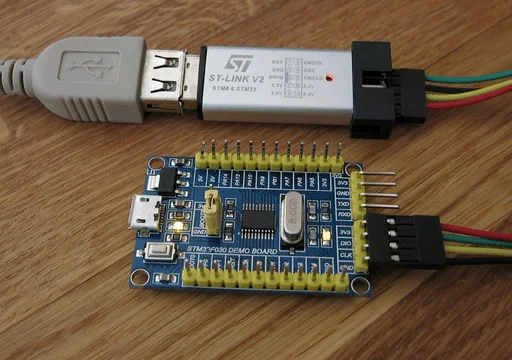
要查看某些内容,你需要在 PC 中使用 UART 外设。
请勿使用 RS232 端口或 USB 转 RS232 转换器!
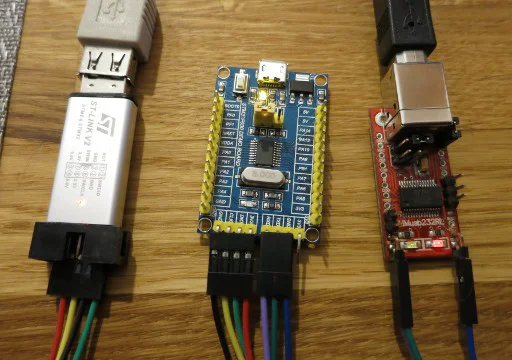
STM32 系列使用 3.3V 逻辑,但是 RS232 可以产生 -15 V ~ +15 V 的电压,这可能会损坏你的 MCU。你需要使用 3.3V 逻辑的 USB 转 UART 转换器。流行的转换器基于 FT232 或 CP2102 芯片。
UART
你还需要一些终端仿真程序(我更喜欢 picocom)。刷新新图像,运行终端仿真器,然后按几次复位按钮:
$ openocd -d0 -f interface/stlink.cfg -f target/stm32f0x.cfg -c 'init; program cortexm0.elf; reset run; exit'Open On-Chip Debugger 0.10.0+dev-00319-g8f1f912a (2018-03-07-19:20)Licensed under GNU GPL v2For bug reports, readhttp://openocd.org/doc/doxygen/bugs.htmldebug_level: 0adapter speed: 1000 kHzadapter_nsrst_delay: 100none separateadapter speed: 950 kHztarget halted due to debug-request, current mode: ThreadxPSR: 0xc1000000 pc: 0x080016f4 msp: 0x20000a20adapter speed: 4000 kHz** Programming Started **auto erase enabledtarget halted due to breakpoint, current mode: ThreadxPSR: 0x61000000 pc: 0x2000003a msp: 0x20000a20wrote 13312 bytes from file cortexm0.elf in 1.020185s (12.743 KiB/s)** Programming Finished **adapter speed: 950 kHz$$ picocom -b 115200 /dev/ttyUSB0picocom v3.1port is : /dev/ttyUSB0flowcontrol : nonebaudrate is : 115200parity is : nonedatabits are : 8stopbits are : 1escape is : C-alocal echo is : nonoinit is : nonoreset is : nohangup is : nonolock is : nosend_cmd is : sz -vvreceive_cmd is : rz -vv -Eimap is :omap is :emap is : crcrlf,delbs,logfile is : noneinitstring : noneexit_after is : not setexit is : noType [C-a] [C-h] to see available commandsTerminal readyHello, World!Hello, World!Hello, World!
每次按下复位按钮都会产生新的 “Hello,World!”行。一切都在按预期进行。
要查看此 MCU 的 双向 UART 代码,请查看 此示例。
io.Writer 接口
io.Writererror
type Writer interface {Write(p []byte) (n int, err error)}
usart.Driverio.Writer
tts.WriteString("Hello, World!\r\n")
为
io.WriteString(tts, "Hello, World!\r\n")
ioimportio.WriteString
func WriteString(w Writer, s string) (n int, err error)
io.WriteStringio.WriterWriteStringWrite让我们编译修改后的程序:
$ egc$ arm-none-eabi-size cortexm0.elftext data bss dec hex filename15456 320 248 16024 3e98 cortexm0.elf
io.WriteString使用这个命令:
arm-none-eabi-nm --print-size --size-sort --radix=d cortexm0.elf
awkdiff
> 00000062 T stm32$hal$usart$Driver$DisableRx> 00000072 T stm32$hal$usart$Driver$RxDMAISR> 00000076 T internal$Type$Implements> 00000080 T stm32$hal$usart$Driver$EnableRx> 00000084 t errors$New> 00000096 R $8$stm32$hal$usart$Driver$$> 00000100 T stm32$hal$usart$Error$Error> 00000360 T io$WriteString> 00000660 T stm32$hal$usart$Driver$Read
usart.Driver.ReadDisableRxRxDMAISREnableRximportstrconvio
func main() {a := 12b := -123tts.WriteString("a = ")strconv.WriteInt(tts, a, 10, 0, 0)tts.WriteString("\r\n")tts.WriteString("b = ")strconv.WriteInt(tts, b, 10, 0, 0)tts.WriteString("\r\n")tts.WriteString("hex(a) = ")strconv.WriteInt(tts, a, 16, 0, 0)tts.WriteString("\r\n")tts.WriteString("hex(b) = ")strconv.WriteInt(tts, b, 16, 0, 0)tts.WriteString("\r\n")}
io.WriteStringstrconv.WriteIntio.Writer
$ egc/usr/local/arm/bin/arm-none-eabi-ld: /home/michal/firstemgo/cortexm0.elf section `.rodata' will not fit in region `Flash'/usr/local/arm/bin/arm-none-eabi-ld: region `Flash' overflowed by 692 bytesexit status 1
这一次我们的空间超出的不多。让我们试着精简一下有关类型的信息:
$ cd $HOME/emgo$ ./clean.sh$ cd $HOME/firstemgo$ egc -nf -nt$ arm-none-eabi-size cortexm0.elftext data bss dec hex filename15876 316 320 16512 4080 cortexm0.elf
很接近,但很合适。让我们加载并运行此代码:
a = 12b = -123hex(a) = chex(b) = -7b
strconvfmtWriteFormat
func main() {b := -123strconv.WriteInt(tts, b, 10, 0, 0)tts.WriteString("\r\n")strconv.WriteInt(tts, b, 10, 6, ' ')tts.WriteString("\r\n")strconv.WriteInt(tts, b, 10, 6, '0')tts.WriteString("\r\n")strconv.WriteInt(tts, b, 10, 6, '.')tts.WriteString("\r\n")strconv.WriteInt(tts, b, 10, -6, ' ')tts.WriteString("\r\n")strconv.WriteInt(tts, b, 10, -6, '0')tts.WriteString("\r\n")strconv.WriteInt(tts, b, 10, -6, '.')tts.WriteString("\r\n")}
下面是它的输出:
-123-123-00123..-123-123-123-123..
Unix 流 和 莫尔斯电码
io.WriterFILE
echo "Hello, World!" > file.txt
>|trecho
echo "Hello, World!" | tr a-z A-Z > file.txt
io.Writer
io.WriteString(tts, "Hello, World!\r\n")
采用以下伪 unix 形式:
io.WriteString "Hello, World!" | usart.Driver usart.USART1
下一个示例将显示如何执行此操作:
io.WriteString "Hello, World!" | MorseWriter | usart.Driver usart.USART1
让我们来创建一个简单的编码器,它使用莫尔斯电码对写入的文本进行编码:
type MorseWriter struct {W io.Writer}func (w *MorseWriter) Write(s []byte) (int, error) {var buf [8]bytefor n, c := range s {switch {case c == '\n':c = ' ' // Replace new lines with spaces.case 'a' <= c && c <= 'z':c -= 'a' - 'A' // Convert to upper case.}if c < ' ' || 'Z' < c {continue // c is outside ASCII [' ', 'Z']}var symbol morseSymbolif c == ' ' {symbol.length = 1buf[0] = ' '} else {symbol = morseSymbols[c-'!']for i := uint(0); i < uint(symbol.length); i++ {if (symbol.code>>i)&1 != 0 {buf[i] = '-'} else {buf[i] = '.'}}}buf[symbol.length] = ' 'if _, err := w.W.Write(buf[:symbol.length+1]); err != nil {return n, err}}return len(s), nil}type morseSymbol struct {code, length byte}//emgo:constvar morseSymbols = [...]morseSymbol{{1<<0 | 1<<1 | 1<<2, 4}, // ! ---.{1<<1 | 1<<4, 6}, // " .-..-.{}, // #{1<<3 | 1<<6, 7}, // $ ...-..-// Some code omitted...{1<<0 | 1<<3, 4}, // X -..-{1<<0 | 1<<2 | 1<<3, 4}, // Y -.--{1<<0 | 1<<1, 4}, // Z --..}
morseSymbols//emgo:constmorseSymbols现在我们可以通过两种方式打印句子:
func main() {s := "Hello, World!\r\n"mw := &MorseWriter{tts}io.WriteString(tts, s)io.WriteString(mw, s)}
MorseWriter&MorseWriter{tts}MorseWriter{tts}MorseWriterslicefloat64complex128让我们编译此代码并查看其输出:
$ egc$ arm-none-eabi-size cortexm0.elftext data bss dec hex filename15152 324 248 15724 3d6c cortexm0.elf
Hello, World!.... . .-.. .-.. --- --..-- .-- --- .-. .-.. -.. ---.
终极闪烁
Blinky 是等效于 “Hello,World!” 程序的硬件。一旦有了摩尔斯编码器,我们就可以轻松地将两者结合起来以获得终极闪烁程序:
package mainimport ("delay""io""stm32/hal/gpio""stm32/hal/system""stm32/hal/system/timer/systick")var led gpio.Pinfunc init() {system.SetupPLL(8, 1, 48/8)systick.Setup(2e6)gpio.A.EnableClock(false)led = gpio.A.Pin(4)cfg := gpio.Config{Mode: gpio.Out, Driver: gpio.OpenDrain, Speed: gpio.Low}led.Setup(&cfg)}type Telegraph struct {Pin gpio.PinDotms int // Dot length [ms]}func (t Telegraph) Write(s []byte) (int, error) {for _, c := range s {switch c {case '.':t.Pin.Clear()delay.Millisec(t.Dotms)t.Pin.Set()delay.Millisec(t.Dotms)case '-':t.Pin.Clear()delay.Millisec(3 * t.Dotms)t.Pin.Set()delay.Millisec(t.Dotms)case ' ':delay.Millisec(3 * t.Dotms)}}return len(s), nil}func main() {telegraph := &MorseWriter{Telegraph{led, 100}}for {io.WriteString(telegraph, "Hello, World! ")}}// Some code omitted...
MorseWriter
$ egc$ arm-none-eabi-size cortexm0.elftext data bss dec hex filename11772 244 244 12260 2fe4 cortexm0.elf
Ultimate Blinky
反射
reflectfmt.Printprintlnfmt.Println
package mainimport ("debug/semihosting""reflect""strconv""stm32/hal/system""stm32/hal/system/timer/systick")var stdout semihosting.Filefunc init() {system.SetupPLL(8, 1, 48/8)systick.Setup(2e6)var err errorstdout, err = semihosting.OpenFile(":tt", semihosting.W)for err != nil {}}type stringer interface {String() string}func println(args ...interface{}) {for i, a := range args {if i > 0 {stdout.WriteString(" ")}switch v := a.(type) {case string:stdout.WriteString(v)case int:strconv.WriteInt(stdout, v, 10, 0, 0)case bool:strconv.WriteBool(stdout, v, 't', 0, 0)case stringer:stdout.WriteString(v.String())default:stdout.WriteString("%unknown")}}stdout.WriteString("\r\n")}type S struct {A intB bool}func main() {p := &S{-123, true}v := reflect.ValueOf(p)println("kind(p) =", v.Kind())println("kind(*p) =", v.Elem().Kind())println("type(*p) =", v.Elem().Type())v = v.Elem()println("*p = {")for i := 0; i < v.NumField(); i++ {ft := v.Type().Field(i)fv := v.Field(i)println(" ", ft.Name(), ":", fv.Interface())}println("}")}
semihosting.OpenFile:ttprintln
func println(args ...interface{})
interface{}println
switch v := a.(type) {case string:stdout.WriteString(v)case int:strconv.WriteInt(stdout, v, 10, 0, 0)case bool:strconv.WriteBool(stdout, v, 't', 0, 0)case stringer:stdout.WriteString(v.String())default:stdout.WriteString("%unknown")}
stringerString()casevcasereflect.ValueOf(p)pv.Elem()让我们尝试编译这段代码。现在让我们看看如果编译时没有类型和字段名,会有什么结果:
$ egc -nt -nf$ arm-none-eabi-size cortexm0.elftext data bss dec hex filename16028 216 312 16556 40ac cortexm0.elf
闪存上只剩下 140 个可用字节。让我们使用启用了半主机的 OpenOCD 加载它:
$ openocd -d0 -f interface/stlink.cfg -f target/stm32f0x.cfg -c 'init; program cortexm0.elf; arm semihosting enable; reset run'Open On-Chip Debugger 0.10.0+dev-00319-g8f1f912a (2018-03-07-19:20)Licensed under GNU GPL v2For bug reports, readhttp://openocd.org/doc/doxygen/bugs.htmldebug_level: 0adapter speed: 1000 kHzadapter_nsrst_delay: 100none separateadapter speed: 950 kHztarget halted due to debug-request, current mode: ThreadxPSR: 0xc1000000 pc: 0x08002338 msp: 0x20000a20adapter speed: 4000 kHz** Programming Started **auto erase enabledtarget halted due to breakpoint, current mode: ThreadxPSR: 0x61000000 pc: 0x2000003a msp: 0x20000a20wrote 16384 bytes from file cortexm0.elf in 0.700133s (22.853 KiB/s)** Programming Finished **semihosting is enabledadapter speed: 950 kHzkind(p) = ptrkind(*p) = structtype(*p) =*p = {X. : -123X. : true}
如果你实际运行此代码,则会注意到半主机运行缓慢,尤其是在逐字节写入时(缓冲很有用)。
*pX.-nt -nf
$ egc$ arm-none-eabi-size cortexm0.elftext data bss dec hex filename16052 216 312 16580 40c4 cortexm0.elf
main
kind(p) = ptrkind(*p) = structtype(*p) = S*p = {A : -123B : true}
反射是任何易于使用的序列化库的关键部分,而像 JSON 这样的序列化 算法 在物联网时代也越来越重要。
这些就是我完成的本文的第二部分。我认为有机会进行第三部分,更具娱乐性的部分,在那里我们将各种有趣的设备连接到这块板上。如果这块板装不下,我们就换一块大一点的。