目录
1 下载,配置,启动 kafka
配置修改
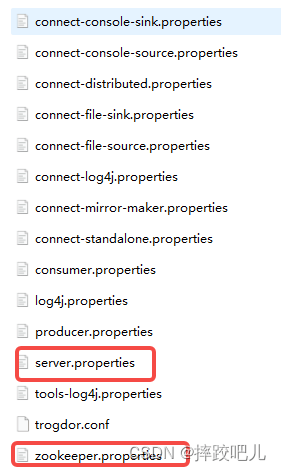
在config目录下的server文件和zookeeper文件,其中分别修改kafka的日志保存路径和zookeeper的数据保存路径。

启动kafka
先启动kafka自带的zookeeper,在kafka的根目录下打开终端,使用配置文件启动
./bin/windows/zookeeper-server-start.bat config/zookeeper.properties
同样在kafka目录的根目录下启动kafka
./bin/windows/kafka-server-start.bat config/server.properties
2 使用golang的github.com/Shopify/sarama库连接kafka
package main

import (
	"fmt"
	"time"

	"github.com/Shopify/sarama"
)

func main() {
	config:=sarama.NewConfig()
	// 生产者配置
	config.Producer.RequiredAcks=sarama.WaitForAll
	config.Producer.Partitioner=sarama.NewRandomPartitioner
	config.Producer.Return.Successes=true
	// 封装消息
	msg:=&sarama.ProducerMessage{}
	msg.Topic="shopping"
	time_str:=time.Now().Format("2006-01-02 15:04:05")
	msg.Value=sarama.StringEncoder("0413 test log!"+time_str)
	// 连接kafka
	client,err:=sarama.NewSyncProducer([]string{"127.0.0.1:9092"}, config)
	if err!=nil {
		fmt.Println("producer closed", err)
		return
	}
	defer client.Close()
	// 发送消息
	partition,offset,err:=client.SendMessage(msg)
	if err!=nil {
		fmt.Println("send failed", err)
		return
	}
	fmt.Printf("partition:%v offset:%v", partition, offset)
}
*sarama.ProducerMessage3 确认生产者发送成功
使用kafka自带的命令行消费者客户端查看kafka中的数据
在kafka的根目录下
bin/windows/kafka-console-consumer.bat --bootstrap-server 127.0.0.1:9092 --topic shopping --from-beginning
这里的topic和代码中的topic一致,均为shopping
终端会输出之前发送的数据。
您可能感兴趣的文章:
