
本系列文章使用Go语言开发Arduino,该文章讲解硬串口通信的用法。
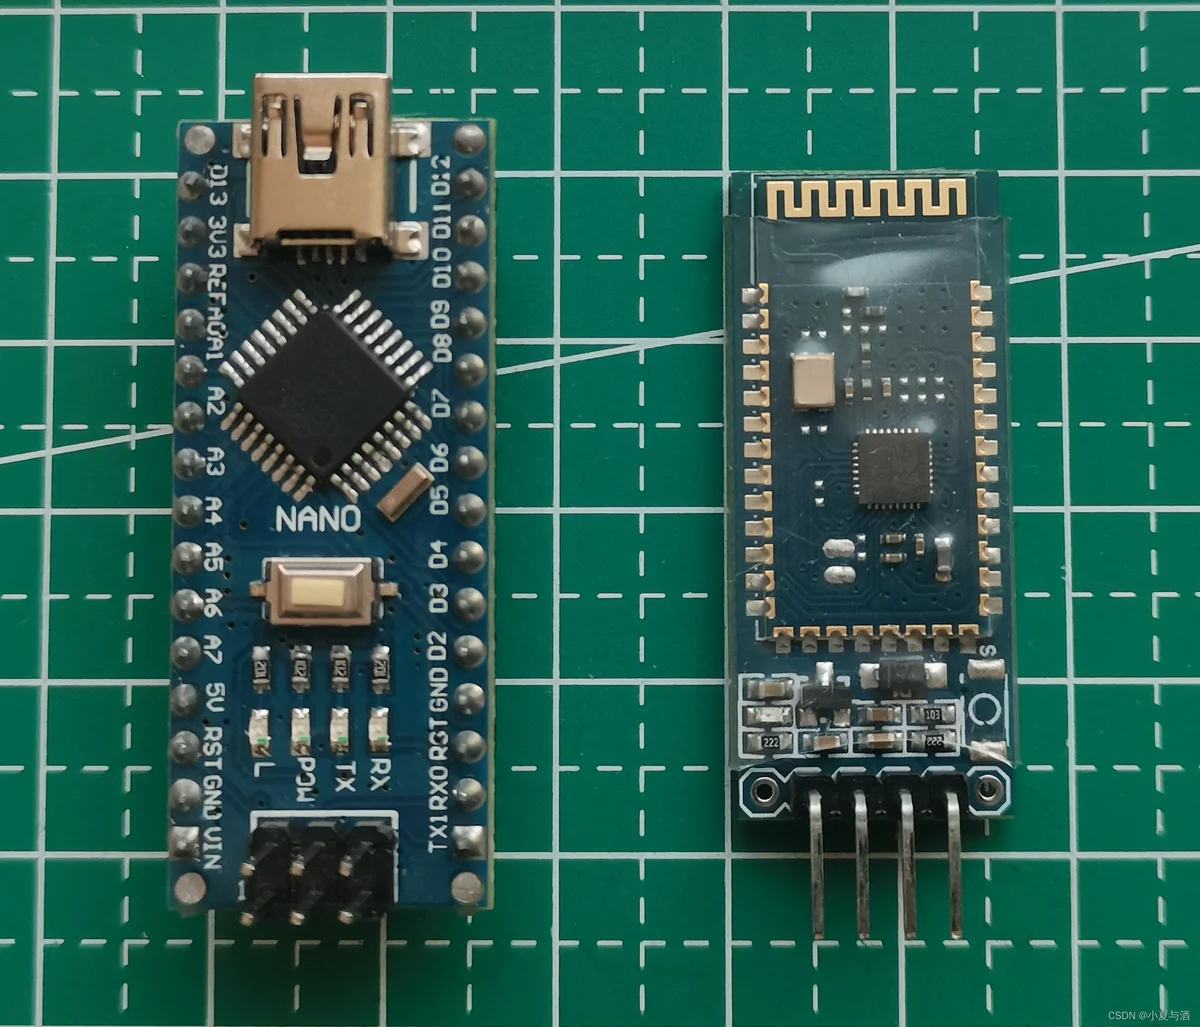
一、硬件连接使用Arduino nano和普通的蓝牙模块:
查看machine库里已定义好的引脚:
// UART pins
const (
	UART_TX_PIN Pin = PD1
	UART_RX_PIN Pin = PD0
)
arduino nano的引脚定义如下:
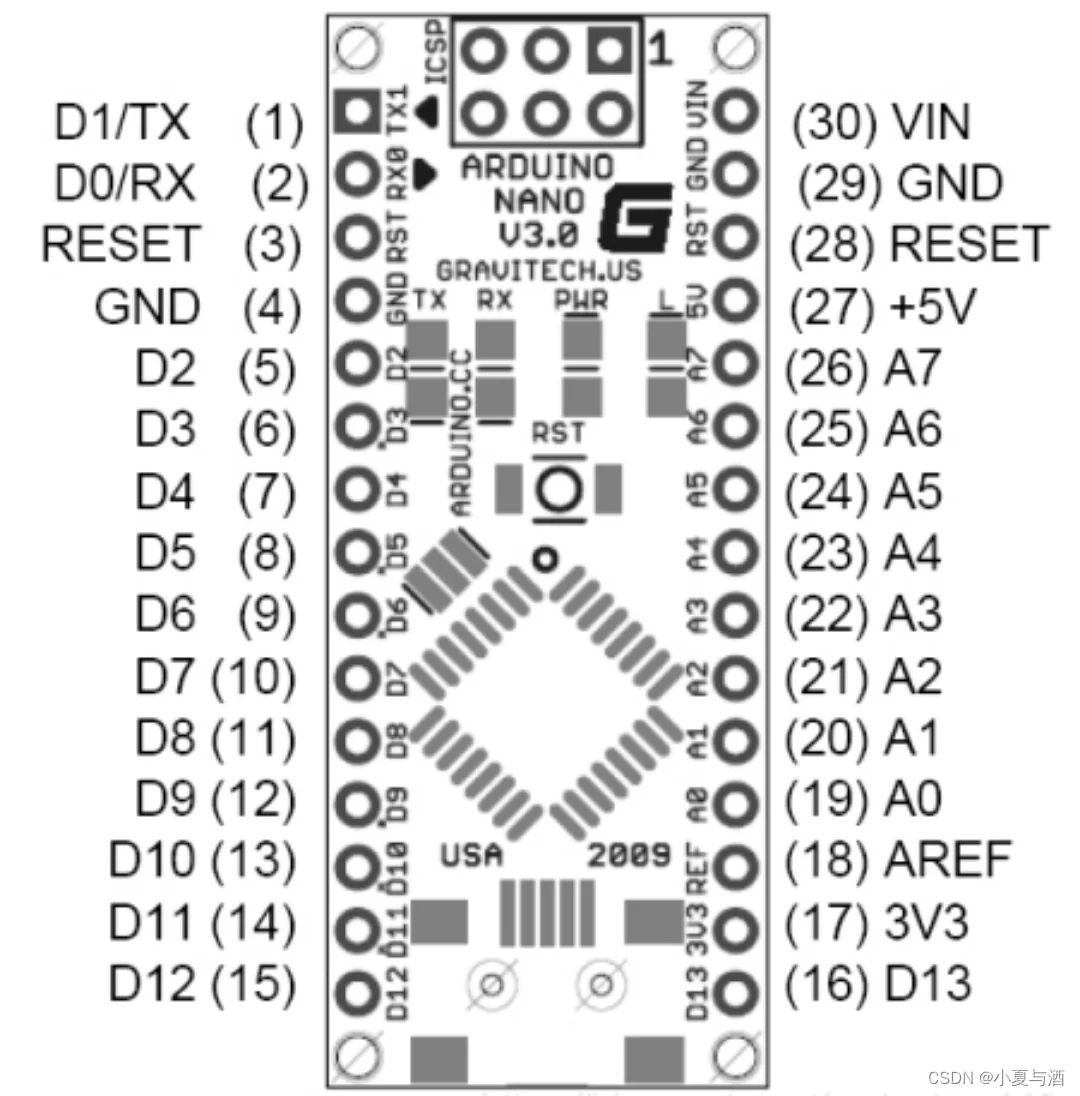
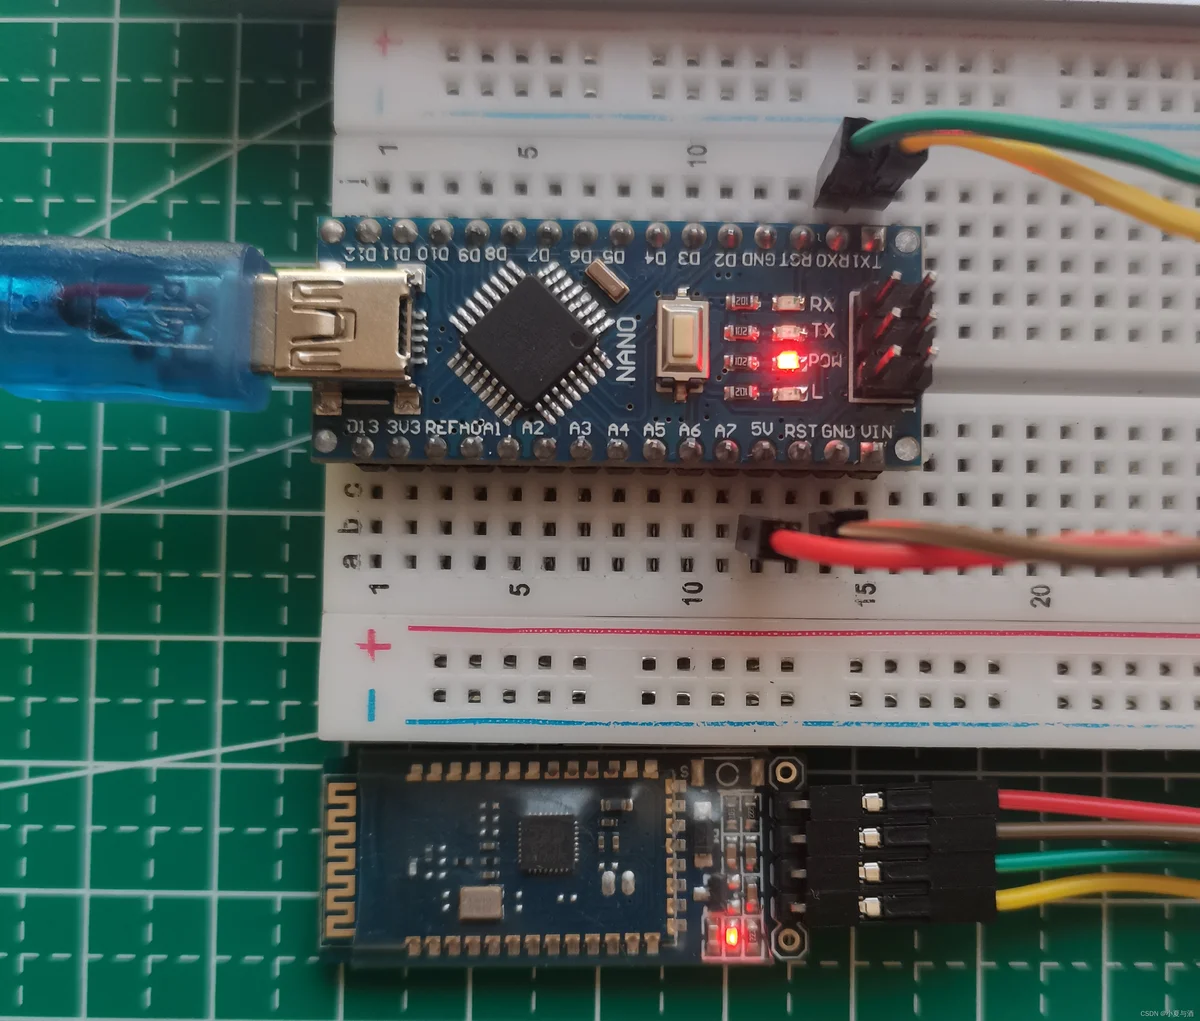
因此,我们的硬件连接如下:
| Arduino nano | 蓝牙模块 |
|---|---|
| D0 | TXD |
| D1 | RXD |
| 5V | VCC |
| GND | GND |

machine库中对arduino nano引脚的定义:
//go:build arduino_nano
// +build arduino_nano

package machine

// Return the current CPU frequency in hertz.
func CPUFrequency() uint32 {
	return 16000000
}

// Digital pins.
const (
	D0  = PD0 // RX0
	D1  = PD1 // TX1
	D2  = PD2
	D3  = PD3
	D4  = PD4
	D5  = PD5
	D6  = PD6
	D7  = PD7
	D8  = PB0
	D9  = PB1
	D10 = PB2
	D11 = PB3
	D12 = PB4
	D13 = PB5
)

// LED on the Arduino
const LED Pin = D13

// ADC on the Arduino
const (
	ADC0 Pin = PC0
	ADC1 Pin = PC1
	ADC2 Pin = PC2
	ADC3 Pin = PC3
	ADC4 Pin = PC4 // Used by TWI for SDA
	ADC5 Pin = PC5 // Used by TWI for SCL
)

// UART pins
const (
	UART_TX_PIN Pin = PD1
	UART_RX_PIN Pin = PD0
)
我们要实现的目标是:当使用蓝牙发送1的时候,板载LED亮;发送0的时候,板载LED灭。
代码如下:
package main

import (
	"machine"
	"time"
)

var (
	uart = machine.UART0
	tx   = machine.UART_TX_PIN
	rx   = machine.UART_RX_PIN
	led  = machine.LED
)

func main() {
	uart.Configure(machine.UARTConfig{TX: tx, RX: rx})
	for {
		if uart.Buffered() > 0 {
			data, _ := uart.ReadByte()

			if data == '0' {
				led.Low()
			}

			if data == '1' {
				led.High()
			}
		}
		time.Sleep(10 * time.Millisecond)
	}
}
其次,当我们把鼠标放到UART0的时候,提示为UART0属于硬串口:

注意!!!在烧录程序的过程中需要把D0和D1上的连线断开!
否则,将会因为硬串口被占用而无法烧录程序,并报如下错误:
avrdude error: programmer is not responding
avrdude warning: attempt 1 of 10: not in sync: resp=0x00
avrdude error: programmer is not responding
avrdude warning: attempt 2 of 10: not in sync: resp=0x00
avrdude error: programmer is not responding
avrdude warning: attempt 3 of 10: not in sync: resp=0x00
avrdude error: programmer is not responding
avrdude warning: attempt 4 of 10: not in sync: resp=0x00
avrdude error: unable to read: 拒绝访问。

avrdude error: programmer is not responding
avrdude warning: attempt 5 of 10: not in sync: resp=0x00
avrdude error: unable to read: 拒绝访问。

avrdude error: unable to write: sorry no info avail
avrdude error: unable to read: 拒绝访问。

avrdude error: programmer is not responding
avrdude warning: attempt 6 of 10: not in sync: resp=0x00
avrdude error: unable to read: 拒绝访问。

avrdude error: unable to write: sorry no info avail
avrdude error: unable to read: 拒绝访问。

avrdude error: programmer is not responding
avrdude warning: attempt 7 of 10: not in sync: resp=0x00
avrdude error: unable to read: 拒绝访问。

avrdude error: unable to write: sorry no info avail
avrdude error: unable to read: 拒绝访问。

avrdude error: programmer is not responding
avrdude warning: attempt 8 of 10: not in sync: resp=0x00
avrdude error: unable to read: 拒绝访问。

avrdude error: unable to write: sorry no info avail
avrdude error: unable to read: 拒绝访问。

avrdude error: programmer is not responding
avrdude warning: attempt 9 of 10: not in sync: resp=0x00
avrdude error: unable to read: 拒绝访问。

avrdude error: unable to write: sorry no info avail
avrdude error: unable to read: 拒绝访问。

avrdude error: programmer is not responding
avrdude warning: attempt 10 of 10: not in sync: resp=0x00
avrdude error: unable to read: 拒绝访问。

avrdude error: unable to open programmer arduino on port COM3

avrdude done.  Thank you.
使用手机蓝牙助手连接蓝牙模块,即可控制板载LED的亮灭:

关注我,我将继续更新该系列的文章,带你一起用Go语言玩转Arduino!