
本教程介绍了在Ubuntu 18.04上安装和配置Gogs的步骤。相同的说明适用于Ubuntu 16.04和任何其他基于Ubuntu的发行版。
Gogs是用Go编写的自托管开源git服务器。它包括一个存储库文件编辑器,项目问题跟踪和一个内置的Wiki。
Gogs是轻型应用程序,可以安装在低功率系统上。如果您正在寻找内存占用量少得多的Gitlab替代产品,而又不需要Gitlab提供的所有功能,那么您绝对应该尝试Gogs。
本教程介绍了在Ubuntu 18.04上安装和配置Gogs的步骤。相同的说明适用于Ubuntu 16.04和任何其他基于Ubuntu的发行版。
在你开始之前
Gogs可以使用SQLite,PostgreSQL或MySQL / MariaDB数据库存储其所有数据。
在本教程中,我们将使用SQLite作为选择的数据库。如果您的系统上未安装SQLite,则可以通过键入以下内容进行安装:
sudo apt install sqlite3为了增加安全性,建议设置基本防火墙。您可以按照我们的《如何在Ubuntu 18.04上使用UFW设置防火墙》指南中的步骤进行操作。
安装Gogs
我们将从二进制文件安装Gogs。安装过程非常简单。
安装Git
第一步是在您的服务器上安装Git。为此,请以sudo用户身份运行以下命令,刷新本地软件包索引并安装git软件包:
sudo apt update
sudo apt install git
通过显示Git版本来验证安装:
git --versiongit version 2.17.1创建一个Git用户
通过键入以下内容来创建新的系统用户以运行Gogs服务:
sudo adduser --system --group --disabled-password --shell /bin/bash --home /home/git --gecos 'Git Version Control' git/home/gitAdding system user `git' (UID 111) ...
Adding new group `git' (GID 116) ...
Adding new user `git' (UID 111) with group `git' ...
Creating home directory `/home/git' ...下载Gogs二进制文件
VERSION/tmpVERSION=0.11.86
wget https://dl.gogs.io/${VERSION}/gogs_${VERSION}_linux_amd64.tar.gz -P /tmp/home/gitsudo tar xf /tmp/gogs_*_linux_amd64.tar.gz -C /home/git运行以下命令,将Gogs安装目录的所有权更改为用户和git组:
sudo chown -R git: /home/git/gogs创建系统单位文件
Gogs带有一个Systemd单位文件,该文件已配置为与我们的设置匹配。
/etc/systemd/system/sudo cp /home/git/gogs/scripts/systemd/gogs.service /etc/systemd/system/完成后,启动并启用Gogs服务:
sudo systemctl start gogs
sudo systemctl enable gogs
验证服务是否成功启动:
* gogs.service - Gogs
   Loaded: loaded (/etc/systemd/system/gogs.service; enabled; vendor preset: enabled)
   Active: active (running) since Thu 2019-04-25 04:13:44 PDT; 9s ago
 Main PID: 14376 (gogs)
    Tasks: 8 (limit: 2319)
   CGroup: /system.slice/gogs.service
           `-14376 /home/git/gogs/gogs web
使用Web安装程序安装Gogs
现在已经下载并正在运行Gogs,现在该通过Web界面完成安装了。
http://YOUR_DOMAIN_IR_IP:3000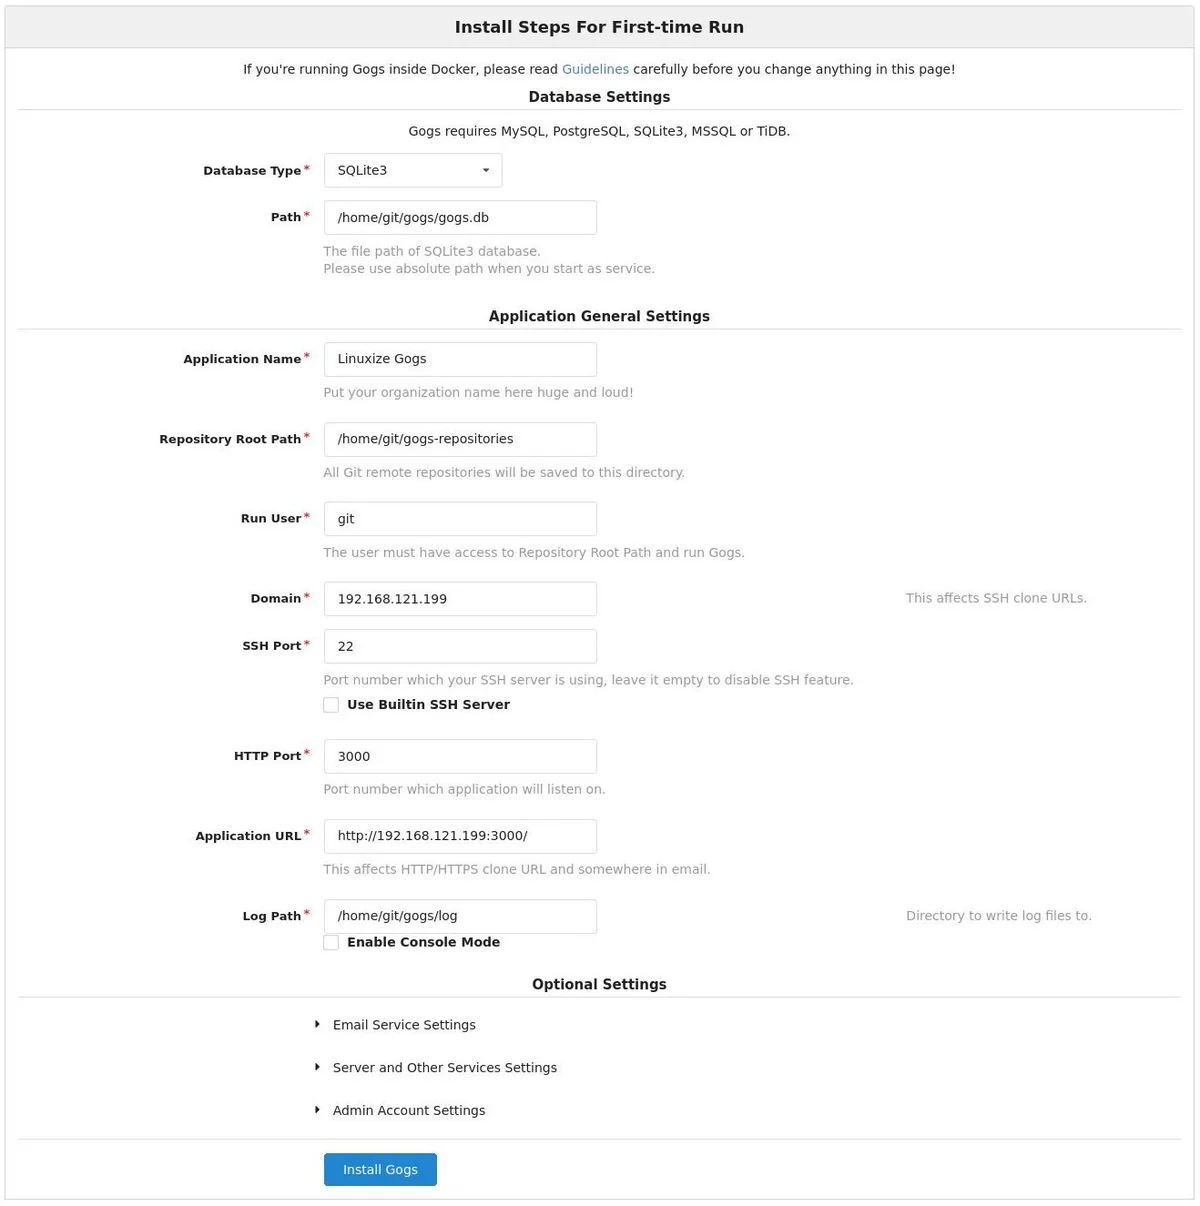
数据库设置:
/home/git/gogs/gogs.db应用程序常规设置
/home/git/gogs-repositories/home/git/gogs/log稍后,您可以通过编辑Gogs配置文件来更改设置。
完成后,点击“安装Gogs”按钮。安装是即时的,完成后您将被重定向到登录页面。
点击“立即注册”链接。
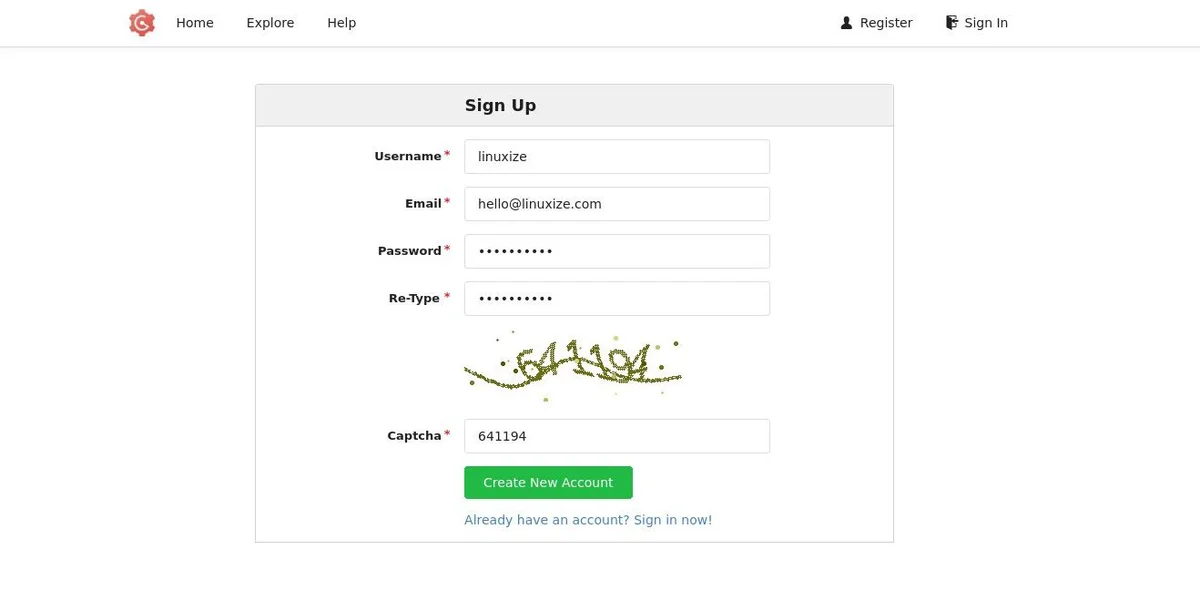
第一个注册用户将自动添加到Admin组。
OK。Gogs已安装在您的Ubuntu机器上。
将Nginx配置为SSL终止代理
gogs.example.com首先,按照以下指南安装Nginx并生成免费的“Let's Encrypt SSL”证书:
完成后,打开文本编辑器并编辑域服务器阻止文件:
sudo nano /etc/nginx/sites-enabled/gogs.example.com/etc/nginx/sites-enabled/gogs.example.com
server {
    listen 80;
    server_name gogs.example.com;

    include snippets/letsencrypt.conf;
    return 301 https://gogs.example.com$request_uri;
}

server {
    listen 443 ssl http2;
    server_name gogs.example.com;

    proxy_read_timeout 720s;
    proxy_connect_timeout 720s;
    proxy_send_timeout 720s;

    client_max_body_size 50m;

    # Proxy headers
    proxy_set_header X-Forwarded-Host $host;
    proxy_set_header X-Forwarded-For $proxy_add_x_forwarded_for;
    proxy_set_header X-Forwarded-Proto $scheme;
    proxy_set_header X-Real-IP $remote_addr;

    # SSL parameters
    ssl_certificate /etc/letsencrypt/live/gogs.example.com/fullchain.pem;
    ssl_certificate_key /etc/letsencrypt/live/gogs.example.com/privkey.pem;
    ssl_trusted_certificate /etc/letsencrypt/live/gogs.example.com/chain.pem;
    include snippets/letsencrypt.conf;
    include snippets/ssl.conf;

    # log files
    access_log /var/log/nginx/gogs.example.com.access.log;
    error_log /var/log/nginx/gogs.example.com.error.log;

    # Handle / requests
    location / {
       proxy_redirect off;
       proxy_pass http://127.0.0.1:3000;
    }
}
重新启动Nginx服务以使更改生效:
sudo systemctl restart nginx接下来,我们需要更改Gogs域和根URL。为此,请打开配置文件并编辑以下行:
sudo nano /home/git/gogs/custom/conf/app.ini/home/git/gogs/custom/conf/app.ini
[server]
DOMAIN           = gogs.example.com
ROOT_URL         = https://gogs.example.com/
通过键入以下命令重新启动Gogs服务:
sudo systemctl restart gogshttps://gogs.example.com配置电子邮件通知
为了使Gogs能够发送通知电子邮件,您可以安装Postfix或使用某些事务性邮件服务,例如SendGrid,MailChimp,MailGun或SES。
要启用电子邮件通知,请打开配置文件并编辑以下行:
sudo nano /home/git/gogs/custom/conf/app.ini/home/git/gogs/custom/conf/app.ini
[mailer]
ENABLED = true
HOST    = SMTP_SERVER:SMTP_PORT
FROM    = SENDER_EMAIL
USER    = SMTP_USER
PASSWD  = YOUR_SMTP_PASSWORD
确保您输入了正确的SMTP服务器信息。
重新启动Gogs服务,以使更改生效:
sudo systemctl restart gogsGogs还允许您通过创建Web Webhook连接到Slack 并将通知发送到Slack频道。
升级Gogs
要升级Gogs,需要执行几个手动步骤。
要升级Gogs,需要执行几个手动步骤。
sudo systemctl stop gogssudo mv /home/git/gogs{,_old}VERSION=<THE_LATEST_GOGS_VERSION>
wget https://dl.gogs.io/${VERSION}/gogs_${VERSION}_linux_amd64.tar.gz -P /tmp
sudo tar xf /tmp/gogs_*_linux_amd64.tar.gz -C /home/gitsudo rsync -a /home/git/gogs_old/{custom,data,log} /home/git/gogs/sudo systemctl restart gogs结论
本教程将指导您完成在Ubuntu 18.04上Gogs的安装和配置。现在,您可以创建第一个项目并开始使用新的Gogs服务器。