
部件提升
Qt中的部件提升非常有用,我们可以在现有的部件基础之上增加一些我们自己个性化的需求。然而由于Go语言的特性,和therecipe/qt的完成度,对于使用部件提升需要一些技巧。
LED-需求描述
StateQLabelsetPicturesetPixmapQWidgetpaintEvent手撸的实现方式
让我们先手撸一下,完整代码如下:
package main

import (
    "os"

    "github.com/therecipe/qt/core"
    "github.com/therecipe/qt/gui"
    "github.com/therecipe/qt/widgets"
)

type Led struct {
    *widgets.QWidget
    State bool
}

func NewLed(p widgets.QWidget_ITF) *Led {
    var par *widgets.QWidget
    if p != nil {
        par = p.QWidget_PTR()
    }
    w := &Led{QWidget: widgets.NewQWidget(par, 0)}
    w.State = true
    w.ConnectPaintEvent(w.paintEvent)
    return w
}

func (c *Led) paintEvent(evt *gui.QPaintEvent) {
    var color *gui.QColor
    if c.State == false {
        color = gui.NewQColor3(255, 0, 0, 128)
    } else {
        color = gui.NewQColor3(0, 255, 0, 128)
    }
    painter := gui.NewQPainter2(c)
    painter.SetBrush(gui.NewQBrush3(color, core.Qt__SolidPattern))
    painter.DrawEllipse3(0, 0, c.Width()-1, c.Height()-1)
}

func main() {
    widgets.NewQApplication(len(os.Args), os.Args)
    window := widgets.NewQDialog(nil, 0)
    window.Resize2(400, 200)
    gridLayout := widgets.NewQGridLayout(window)
    led1 := NewLed(window)
    gridLayout.AddWidget(led1)
    led2 := NewLed(window)
    led2.State = false
    gridLayout.AddWidget2(led2, 0, 1, 0)
    window.Show()
    widgets.QApplication_Exec()
}
运行效果如图:
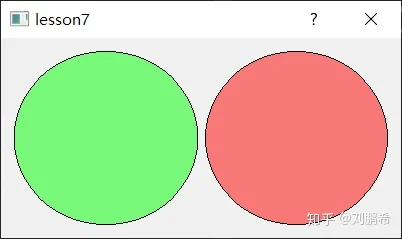
paintEventConnectPaintEvent使用Designer
我们会发现,手撸起来还是挺烦的,尤其是窗口复杂了之后,那么如何用Designer来简化操作呢?(当你看完这节你会发现,就算用了Designer也一样烦……)
QWidget提升为LED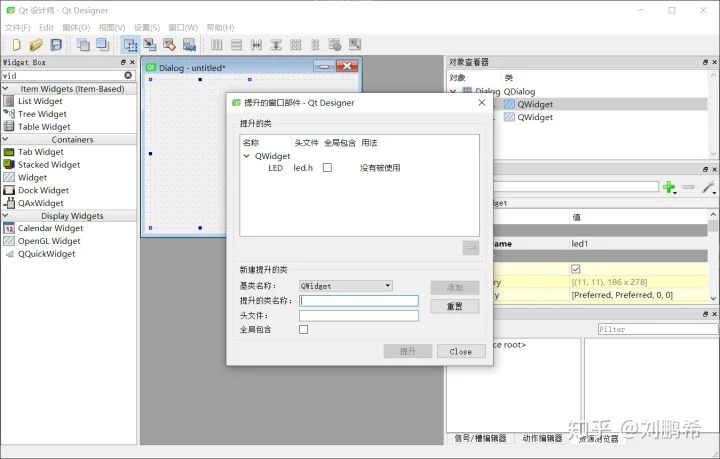
lesson7.uiqtdeployqtrccuic_lesson7.goqtdeployuic_lesson7.gouic_lesson7.goDialogSetupUILEDwidgets.main.gopackage main
import (
"os"
ui "test/myui"
"github.com/therecipe/qt/widgets"
)
func main() {
widgets.NewQApplication(len(os.Args), os.Args)
window := ui.NewDialog(nil)
window.Show()
window.Led2.State = false
widgets.QApplication_Exec()
}
显示效果也是一样的。
rcc