
NSQ是目前比较流行的一个分布式的消息队列,本文主要介绍了NSQ及Go语言如何操作NSQ。
使用消息队列的主要目的,异步、解耦、削峰
NSQ介绍
NSQ是Go语言编写的一个开源的实时分布式内存消息队列,其性能十分优异。 NSQ的优势有以下优势:
- NSQ提倡分布式和分散的拓扑,没有单点故障,支持容错和高可用性,并提供可靠的消息交付保证
- NSQ支持横向扩展,没有任何集中式代理。
- NSQ易于配置和部署,并且内置了管理界面。
NSQ的应用场景
通常来说,消息队列都适用以下场景。
异步处理
参照下图利用消息队列把业务流程中的非关键流程异步化,从而显著降低业务请求的响应时间。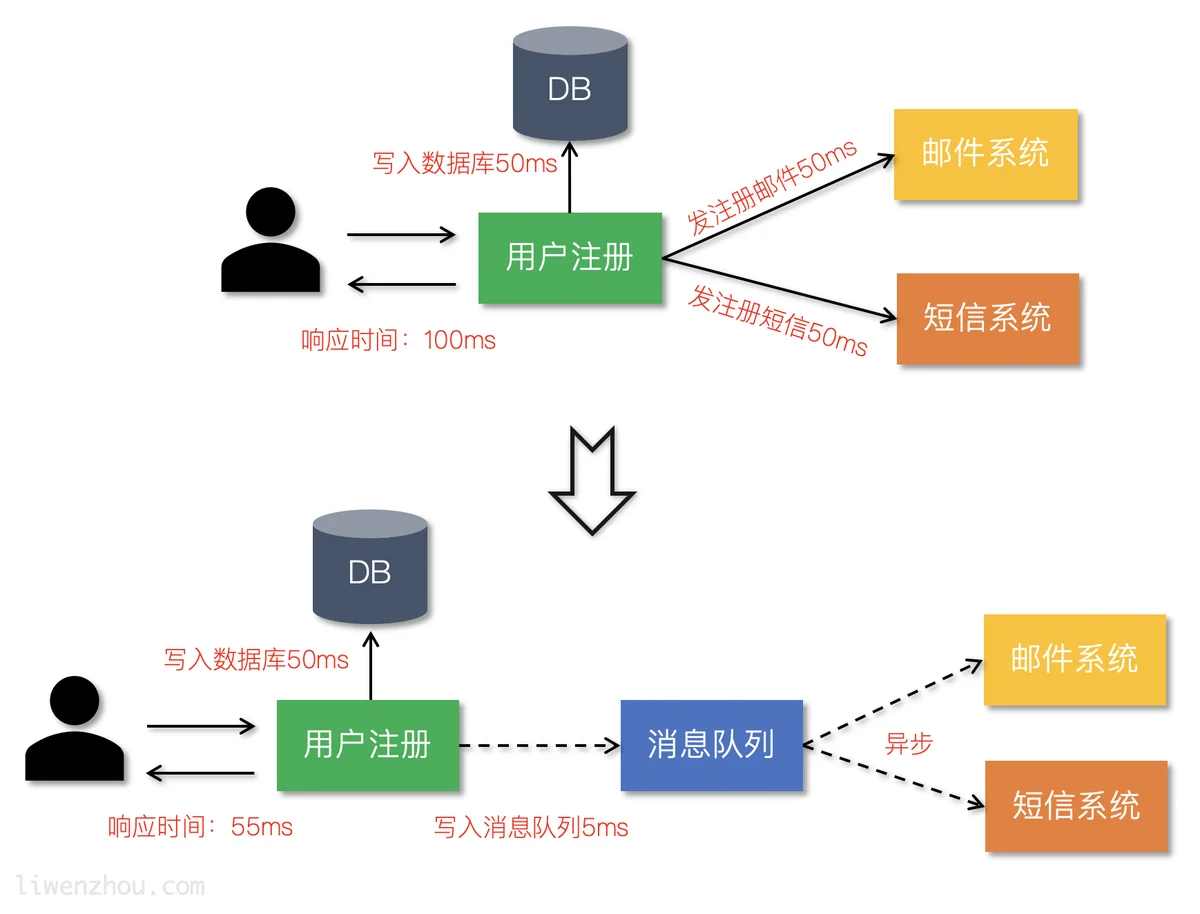
应用解耦
通过使用消息队列将不同的业务逻辑解耦,降低系统间的耦合,提高系统的健壮性。后续有其他业务要使用订单数据可直接订阅消息队列,提高系统的灵活性。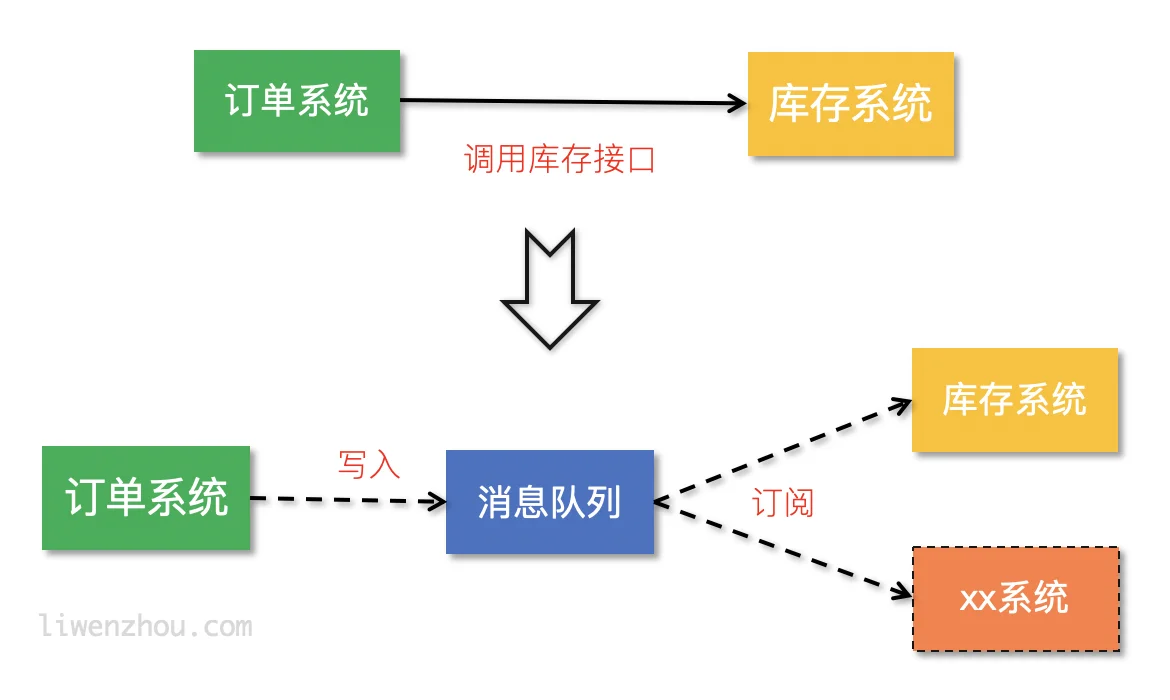
流量削峰
类似秒杀(大秒)等场景下,某一时间可能会产生大量的请求,使用消息队列能够为后端处理请求提供一定的缓冲区,保证后端服务的稳定性。

安装
官方下载页面根据自己的平台下载并解压即可。

NSQ组件
nsqd
nsqd是一个守护进程,它接收、排队并向客户端发送消息。
nsqd-broadcast-address=127.0.0.1./nsqd -broadcast-address=127.0.0.1
nsqlookupdnsqlookupd./nsqd -broadcast-address=127.0.0.1 -lookupd-tcp-address=127.0.0.1:4160
最后我们还需要启动图形化的界面 nsqadmin
nsqadmin -lookupd-http-address=127.0.0.1:4161
然后在启动成功后,在浏览器输入 127.0.0.1:4171,即可进入图形化界面

nsqlookupd-lookupd-tcp-addressnsqdq-auth-http-address value
<addr>:<port> to query auth server (may be given multiple times)
-broadcast-address string
address that will be registered with lookupd (defaults to the OS hostname) (default "PROSNAKES.local")
-config string
path to config file
-data-path string
path to store disk-backed messages
-deflate
enable deflate feature negotiation (client compression) (default true)
-e2e-processing-latency-percentile value
message processing time percentiles (as float (0, 1.0]) to track (can be specified multiple times or comma separated '1.0,0.99,0.95', default none)
-e2e-processing-latency-window-time duration
calculate end to end latency quantiles for this duration of time (ie: 60s would only show quantile calculations from the past 60 seconds) (default 10m0s)
-http-address string
<addr>:<port> to listen on for HTTP clients (default "0.0.0.0:4151")
-http-client-connect-timeout duration
timeout for HTTP connect (default 2s)
-http-client-request-timeout duration
timeout for HTTP request (default 5s)
-https-address string
<addr>:<port> to listen on for HTTPS clients (default "0.0.0.0:4152")
-log-prefix string
log message prefix (default "[nsqd] ")
-lookupd-tcp-address value
lookupd TCP address (may be given multiple times)
-max-body-size int
maximum size of a single command body (default 5242880)
-max-bytes-per-file int
number of bytes per diskqueue file before rolling (default 104857600)
-max-deflate-level int
max deflate compression level a client can negotiate (> values == > nsqd CPU usage) (default 6)
-max-heartbeat-interval duration
maximum client configurable duration of time between client heartbeats (default 1m0s)
-max-msg-size int
maximum size of a single message in bytes (default 1048576)
-max-msg-timeout duration
maximum duration before a message will timeout (default 15m0s)
-max-output-buffer-size int
maximum client configurable size (in bytes) for a client output buffer (default 65536)
-max-output-buffer-timeout duration
maximum client configurable duration of time between flushing to a client (default 1s)
-max-rdy-count int
maximum RDY count for a client (default 2500)
-max-req-timeout duration
maximum requeuing timeout for a message (default 1h0m0s)
-mem-queue-size int
number of messages to keep in memory (per topic/channel) (default 10000)
-msg-timeout string
duration to wait before auto-requeing a message (default "1m0s")
-node-id int
unique part for message IDs, (int) in range [0,1024) (default is hash of hostname) (default 616)
-snappy
enable snappy feature negotiation (client compression) (default true)
-statsd-address string
UDP <addr>:<port> of a statsd daemon for pushing stats
-statsd-interval string
duration between pushing to statsd (default "1m0s")
-statsd-mem-stats
toggle sending memory and GC stats to statsd (default true)
-statsd-prefix string
prefix used for keys sent to statsd (%s for host replacement) (default "nsq.%s")
-sync-every int
number of messages per diskqueue fsync (default 2500)
-sync-timeout duration
duration of time per diskqueue fsync (default 2s)
-tcp-address string
<addr>:<port> to listen on for TCP clients (default "0.0.0.0:4150")
-tls-cert string
path to certificate file
-tls-client-auth-policy string
client certificate auth policy ('require' or 'require-verify')
-tls-key string
path to key file
-tls-min-version value
minimum SSL/TLS version acceptable ('ssl3.0', 'tls1.0', 'tls1.1', or 'tls1.2') (default 769)
-tls-required
require TLS for client connections (true, false, tcp-https)
-tls-root-ca-file string
path to certificate authority file
-verbose
enable verbose logging
-version
print version string
-worker-id
do NOT use this, use --node-id
nsqlookupd
topicnsqlookupdnsqlookupd-broadcast-address string
address of this lookupd node, (default to the OS hostname) (default "PROSNAKES.local")
-config string
path to config file
-http-address string
<addr>:<port> to listen on for HTTP clients (default "0.0.0.0:4161")
-inactive-producer-timeout duration
duration of time a producer will remain in the active list since its last ping (default 5m0s)
-log-prefix string
log message prefix (default "[nsqlookupd] ")
-tcp-address string
<addr>:<port> to listen on for TCP clients (default "0.0.0.0:4160")
-tombstone-lifetime duration
duration of time a producer will remain tombstoned if registration remains (default 45s)
-verbose
enable verbose logging
-version
print version string
nsqadmin
nsqadminnsqlookupd./nsqadmin -lookupd-http-address=127.0.0.1:4161
http://127.0.0.1:4171/nsqadmin-allow-config-from-cidr string
A CIDR from which to allow HTTP requests to the /config endpoint (default "127.0.0.1/8")
-config string
path to config file
-graphite-url string
graphite HTTP address
-http-address string
<addr>:<port> to listen on for HTTP clients (default "0.0.0.0:4171")
-http-client-connect-timeout duration
timeout for HTTP connect (default 2s)
-http-client-request-timeout duration
timeout for HTTP request (default 5s)
-http-client-tls-cert string
path to certificate file for the HTTP client
-http-client-tls-insecure-skip-verify
configure the HTTP client to skip verification of TLS certificates
-http-client-tls-key string
path to key file for the HTTP client
-http-client-tls-root-ca-file string
path to CA file for the HTTP client
-log-prefix string
log message prefix (default "[nsqadmin] ")
-lookupd-http-address value
lookupd HTTP address (may be given multiple times)
-notification-http-endpoint string
HTTP endpoint (fully qualified) to which POST notifications of admin actions will be sent
-nsqd-http-address value
nsqd HTTP address (may be given multiple times)
-proxy-graphite
proxy HTTP requests to graphite
-statsd-counter-format string
The counter stats key formatting applied by the implementation of statsd. If no formatting is desired, set this to an empty string. (default "stats.counters.%s.count")
-statsd-gauge-format string
The gauge stats key formatting applied by the implementation of statsd. If no formatting is desired, set this to an empty string. (default "stats.gauges.%s")
-statsd-interval duration
time interval nsqd is configured to push to statsd (must match nsqd) (default 1m0s)
-statsd-prefix string
prefix used for keys sent to statsd (%s for host replacement, must match nsqd) (default "nsq.%s")
-version
print version string
NSQ架构
NSQ工作模式

Topic和Channel
“topics”topic“channels”channeltopicchanneltopictopicchanneltopictopictopicchannelchannelchanneltopicchannelchenneltopicchanneltopic -> channelchannel -> consumersNSQ接收和发送消息流程
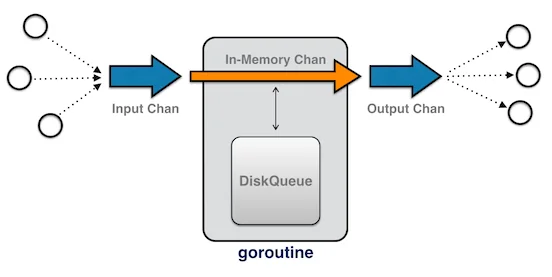
- input Chan:就是go语言中的通道
- In-Memory Chan:是内存的通道,负责将消息进行持久化
- Output Chan:
NSQ特性
--mem-queue-sizeGo操作NSQ
官方提供了Go语言版的客户端:go-nsq,更多客户端支持请查看CLIENT LIBRARIES。
启动
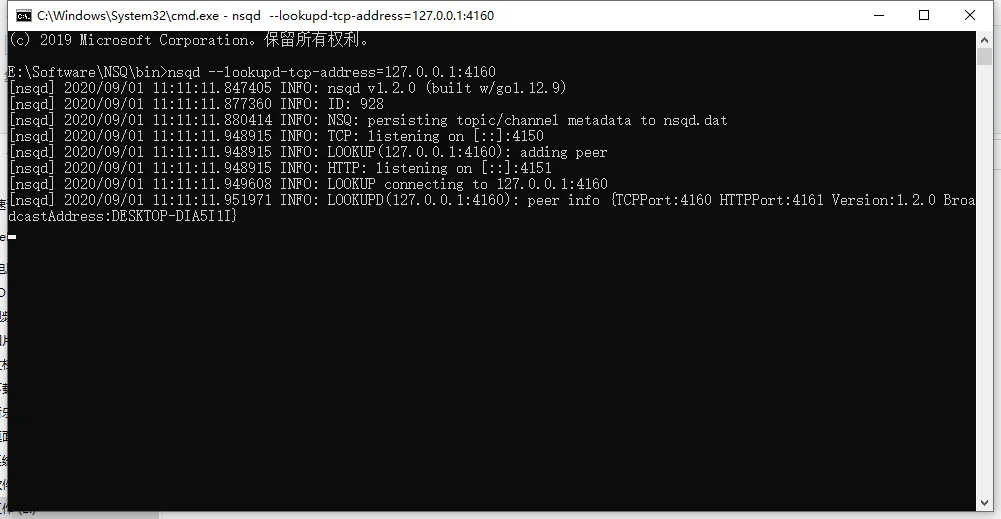
首先进入bin目录下,打开cmd,输入
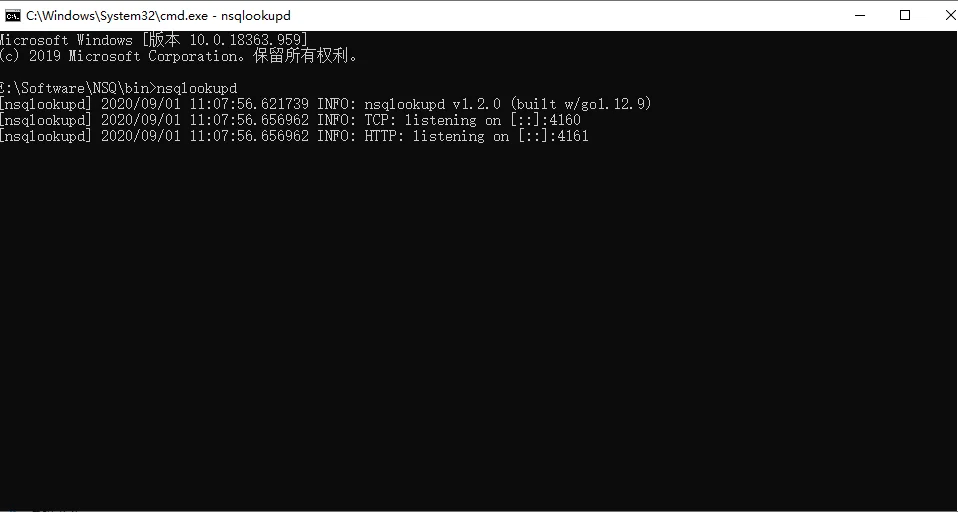
nsqlookupd
然后就开启了nsq服务,端口号是4160
-broadcast-address=127.0.0.1nsqd -broadcast-address=127.0.0.1
nsqlookupdnsqlookupdnsqd -broadcast-address=127.0.0.1 -lookupd-tcp-address=127.0.0.1:4160
启动成功的图片如下所示
安装
go get -u github.com/nsqio/go-nsq
生产者
一个简单的生产者示例代码如下:
// nsq_producer/main.go
package main

import (
    "bufio"
    "fmt"
    "os"
    "strings"

    "github.com/nsqio/go-nsq"
)

// NSQ Producer Demo

var producer *nsq.Producer

// 初始化生产者
func initProducer(str string) (err error) {
    config := nsq.NewConfig()
    producer, err = nsq.NewProducer(str, config)
    if err != nil {
        fmt.Printf("create producer failed, err:%v\n", err)
        return err
    }
    return nil
}

func main() {
    nsqAddress := "127.0.0.1:4150"
    err := initProducer(nsqAddress)
    if err != nil {
        fmt.Printf("init producer failed, err:%v\n", err)
        return
    }

    reader := bufio.NewReader(os.Stdin) // 从标准输入读取
    for {
        data, err := reader.ReadString('\n')
        if err != nil {
            fmt.Printf("read string from stdin failed, err:%v\n", err)
            continue
        }
        data = strings.TrimSpace(data)
        if strings.ToUpper(data) == "Q" { // 输入Q退出
            break
        }
        // 向 'topic_demo' publish 数据
        err = producer.Publish("topic_demo", []byte(data))
        if err != nil {
            fmt.Printf("publish msg to nsq failed, err:%v\n", err)
            continue
        }
    }
}
123456$ ./nsq_producer
123
2018/10/22 18:41:20 INF 1 (127.0.0.1:4150) connecting to nsqd
456
http://127.0.0.1:4171/topictopic_demotopicLWZMBP:4151 (127.0.01:4151)nsqdchannel/nodeslookupdnsqd/counter/lookuptopicchannel消费者
一个简单的消费者示例代码如下:
// nsq_consumer/main.go
package main

import (
    "fmt"
    "os"
    "os/signal"
    "syscall"
    "time"

    "github.com/nsqio/go-nsq"
)

// NSQ Consumer Demo

// MyHandler 是一个消费者类型
type MyHandler struct {
    Title string
}

// HandleMessage 是需要实现的处理消息的方法
func (m *MyHandler) HandleMessage(msg *nsq.Message) (err error) {
    fmt.Printf("%s recv from %v, msg:%v\n", m.Title, msg.NSQDAddress, string(msg.Body))
    return
}

// 初始化消费者
func initConsumer(topic string, channel string, address string) (err error) {
    config := nsq.NewConfig()
    config.LookupdPollInterval = 15 * time.Second
    c, err := nsq.NewConsumer(topic, channel, config)
    if err != nil {
        fmt.Printf("create consumer failed, err:%v\n", err)
        return
    }
    consumer := &MyHandler{
        Title: "沙河1号",
    }
    c.AddHandler(consumer)

    // if err := c.ConnectToNSQD(address); err != nil { // 直接连NSQD
    if err := c.ConnectToNSQLookupd(address); err != nil { // 通过lookupd查询
        return err
    }
    return nil

}

func main() {
    err := initConsumer("topic_demo", "first", "127.0.0.1:4161")
    if err != nil {
        fmt.Printf("init consumer failed, err:%v\n", err)
        return
    }
    c := make(chan os.Signal)        // 定义一个信号的通道
    signal.Notify(c, syscall.SIGINT) // 转发键盘中断信号到c
    <-c                              // 阻塞
}
将上面的代码保存之后编译执行,就能够获取之前我们publish的两条消息了:
$ ./nsq_consumer
2018/10/22 18:49:06 INF    1 [topic_demo/first] querying nsqlookupd http://127.0.0.1:4161/lookup?topic=topic_demo
2018/10/22 18:49:06 INF    1 [topic_demo/first] (127.0.0.1:4150) connecting to nsqd
沙河1号 recv from 127.0.0.1:4150, msg:123
沙河1号 recv from 127.0.0.1:4150, msg:456
/countergo-nsqKafka是一种高吞吐量的分布式发布订阅消息系统,它可以处理消费者规模的网站中的所有动作流数据,具有高性能、持久化、多副本备份、横向扩展等特点。本文介绍了如何使用Go语言发送和接收kafka消息。
启动Kafka
上一篇博客中,讲了kafka的安装和启动
# 启动Zookeeper
 .\zookeeper-server-start.bat ..\..\config\zookeeper.properties

# 启动kafka
 .\kafka-server-start.bat ..\..\config\server.propertiesCopy to clipboardErrorCopied
sarama
Go语言中连接kafka使用第三方库:github.com/Shopify/sarama。
下载及安装
go get github.com/Shopify/saramaCopy to clipboardErrorCopied
注意事项
saramazstd# github.com/DataDog/zstd
exec: "gcc":executable file not found in %PATH%Copy to clipboardErrorCopied
所以在Windows平台请使用v1.19版本的sarama。
连接kafka发送消息
package main

import (
    "fmt"

    "github.com/Shopify/sarama"
)

// 基于sarama第三方库开发的kafka client

func main() {
    config := sarama.NewConfig()
    config.Producer.RequiredAcks = sarama.WaitForAll          // 发送完数据需要leader和follow都确认
    config.Producer.Partitioner = sarama.NewRandomPartitioner // 新选出一个partition
    config.Producer.Return.Successes = true                   // 成功交付的消息将在success channel返回

    // 构造一个消息
    msg := &sarama.ProducerMessage{}
    msg.Topic = "web_log"
    msg.Value = sarama.StringEncoder("this is a test log")
    // 连接kafka
    client, err := sarama.NewSyncProducer([]string{"192.168.1.7:9092"}, config)
    if err != nil {
        fmt.Println("producer closed, err:", err)
        return
    }
    defer client.Close()
    // 发送消息
    pid, offset, err := client.SendMessage(msg)
    if err != nil {
        fmt.Println("send msg failed, err:", err)
        return
    }
    fmt.Printf("pid:%v offset:%v\n", pid, offset)
}Copy to clipboardErrorCopied
连接kafka消费消息
package main

import (
    "fmt"

    "github.com/Shopify/sarama"
)

// kafka consumer

func main() {
    consumer, err := sarama.NewConsumer([]string{"127.0.0.1:9092"}, nil)
    if err != nil {
        fmt.Printf("fail to start consumer, err:%v\n", err)
        return
    }
    partitionList, err := consumer.Partitions("web_log") // 根据topic取到所有的分区
    if err != nil {
        fmt.Printf("fail to get list of partition:err%v\n", err)
        return
    }
    fmt.Println(partitionList)
    for partition := range partitionList { // 遍历所有的分区
        // 针对每个分区创建一个对应的分区消费者
        pc, err := consumer.ConsumePartition("web_log", int32(partition), sarama.OffsetNewest)
        if err != nil {
            fmt.Printf("failed to start consumer for partition %d,err:%v\n", partition, err)
            return
        }
        defer pc.AsyncClose()
        // 异步从每个分区消费信息
        go func(sarama.PartitionConsumer) {
            for msg := range pc.Messages() {
                fmt.Printf("Partition:%d Offset:%d Key:%v Value:%v", msg.Partition, msg.Offset, msg.Key, msg.Value)
            }
        }(pc)
    }
}Copy to clipboardErrorCopied
LogTransfer实现
参考源码 20_LogTransfer
LogTransfer的主要功能,就是将kafka中的日志信息取出来,然后发送到ElasticSearch中,下面我们就需要编码实现以下过程
文件结构
LogTransfer首先包含多个模块
- kafka:用于kafka操作相关
- es:用于es操作相关
- conf:配置相关
Conf模块
conf模块是配置模块,用于进行LogTransfer的配置
cfg.ini
我们使用ini管理配置信息
[kafka]
address=127.0.0.1:9092
topic=web_log

[es]
address=127.0.0.1:9200Copy to clipboardErrorCopied
cfg.go
然后定义配置类的结构体
package conf

type LogTransferCfg struct {
    KafkaCfg `ini:"kafka"` // 这个对应ini文件中的 [kafka]
    EsCfg `ini:"es"` // 这个对应ini文件中的 [es]
}

// Kafka配置类
type KafkaCfg struct {
    Address string `ini:"address"`
    Topic string `ini:"topic"`
}

// Es配置类
type EsCfg struct {
    Address string `ini:"address"`
}
LogTransfer首先包含多个模块

- kafka:用于kafka操作相关
- es:用于es操作相关
- conf:配置相关
-

### Conf模块

conf模块是配置模块,用于进行LogTransfer的配置

#### cfg.ini

我们使用ini管理配置信息

```bash
[kafka]
address=127.0.0.1:9092
topic=web_log

[es]
address=127.0.0.1:9200Copy to clipboardErrorCopied
cfg.go
然后定义配置类的结构体
package conf

type LogTransferCfg struct {
    KafkaCfg `ini:"kafka"` // 这个对应ini文件中的 [kafka]
    EsCfg `ini:"es"` // 这个对应ini文件中的 [es]
}

// Kafka配置类
type KafkaCfg struct {
    Address string `ini:"address"`
    Topic string `ini:"topic"`
}

// Es配置类
type EsCfg struct {
    Address string `ini:"address"`
}